Key Takeaways:
- What It Is: Plumbing tape (Teflon/PTFE tape) is a thread lubricant, not a sealant, that helps create watertight and gas-tight connections.
- Types of Tape: Use white tape for water, yellow for gas, pink for heavy-duty applications, and green for oxygen systems.
- Application Basics: Clean threads, wrap clockwise starting at the second thread, use 3-4 wraps, and smooth it down for a proper seal.
- When to Call a Pro: If leaks persist, threads are damaged, or you’re working with gas lines, it’s time to bring in the experts.
Let’s be honest—plumbing tape doesn’t exactly scream excitement. It’s not trending on TikTok. Nobody’s posting Instagram stories about their “plumbing tape journey.” But this humble white tape can be the difference between a bone-dry connection and a slow drip that eventually ruins your ceiling, cabinets, or relationship as your partner listens to that maddening “plink… plink… plink” at 3 AM.
Known variously as Teflon tape, PTFE tape, or “that white plumber’s tape,” this seemingly simple product is misused by amateur plumbers everywhere. So let’s unwrap the mysteries and get you using it like someone who actually knows what they’re doing.
What the Hell Is Plumbing Tape Anyway?
Plumbing tape is a thin, stretchy tape made from polytetrafluoroethylene (PTFE), which is basically plastic with superpowers. It’s slippery yet creates a watertight and gas-tight seal when compressed between threaded metal connections. It’s also resistant to nearly all chemicals, handles extreme temperatures from -450°F to 500°F, and doesn’t age or degrade.
But here’s what plumbing tape is NOT:
- A magic fix for active leaks
- A replacement for a proper pipe fitting
- Electrical tape’s cousin
- Something to wrap around pipes like a mummy
The Great Plumbing Tape Misconception
The biggest myth about plumbing tape? It’s some kind of sealant that sticks to pipes and blocks water. Nope! Plumbing tape actually works as a thread lubricant that allows you to tighten threaded connections further, creating a better metal-to-metal seal. When compressed between the threads, it fills microscopic gaps that water or gas molecules can’t squeeze through.
This distinction matters because it explains why slapping tape on an existing leak does absolutely nothing except waste tape and make you look foolish in front of your pipes, which already judge you enough.
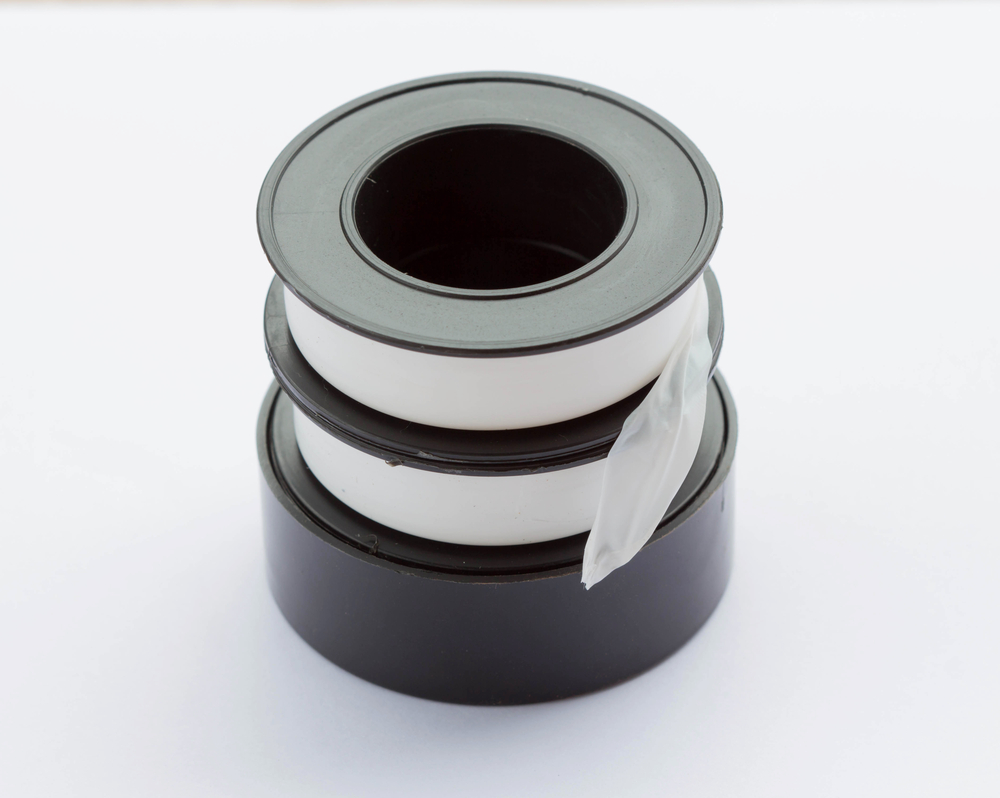
Types of Plumbing Tape: A Rainbow of Functional Options
Thought all plumbing tape was the same? Think again, amateur! Different colors serve different purposes:
White Tape: The Standard
- Thickness: Standard density
- Best for: Most residential water connections
- Working pressure: Handles up to about 3,000 PSI
- When to use it: Nearly all household plumbing with water or air
Yellow Tape: The Gas Guy
- Thickness: Higher density, typically 3.0-3.5 mil
- Best for: Natural gas, propane, and other combustible gas lines
- When to use it: Gas connections for water heaters, stoves, and outdoor grills
- Safety note: NEVER use white tape for gas connections!
Pink Tape: The Heavy-Duty Option
- Thickness: Highest density, around 4.0 mil
- Best for: Larger pipe sizes and higher pressures
- When to use it: Main water lines or high-pressure applications
Green Tape: The Oxygen Specialist
- Thickness: Similar to white
- Best for: Oxygen systems
- When to use it: Medical gas systems or oxygen-rich environments
- Why special?: Oil-free and won’t combust in pure oxygen
The Right Way to Apply Plumbing Tape (Yes, There IS a Wrong Way)
Here’s the step-by-step process that separates the pros from the people who’ll be calling the pros at midnight:
Step 1: Clean Those Dirty Threads
Before applying tape, make sure the pipe threads are clean and dry. Wipe off any gunk, old tape remnants, pipe dope, or microscopic debris. Putting tape over dirt is like putting clean underwear over dirty underwear—technically, you did something, but you missed the point entirely.
Step 2: Direction Matters—A LOT
This is where 90% of DIYers screw up. The tape must be applied in the same direction you’ll be turning the pipe—clockwise when looking at the end of the pipe. Why? Because when you screw the fitting on, it won’t push against the tape and cause it to bunch up or tear.
To remember the direction: Hold the threaded end of the pipe facing you. The tape should be unwound counterclockwise as you wrap it around clockwise.
Step 3: Start at the Right Spot
Begin wrapping the tape at the second thread from the end, not the very end thread. Starting at the end often results in the tape getting shredded as you screw the fitting on, creating debris that can clog aerators, shower heads, or other components. Nothing like solving one problem while creating another!
Step 4: The Tension Sweet Spot
Pull the tape slightly taut as you wrap. Too loose and it’ll bunch up; too tight and it’ll tear. You want just enough tension that the tape conforms to the threads without stretching into oblivion. Think of wrapping a present—you want the paper to follow the contours without ripping.
Step 5: The Magic Number: 3-4 Wraps
Three to four complete wraps around the pipe is the sweet spot for most household applications. Less won’t create a proper seal; more is just wasting tape and might make it harder to get the proper connection.
For gas connections, we at Brian Wear Plumbing strongly advise that only trained professionals handle any work involving gas lines. For safety reasons, we do not condone unlicensed or untrained individuals working on gas systems under any circumstances.
Step 6: Smooth It Down
After wrapping, run your fingers around the tape to smooth it down into the threads. This helps the tape bond to the pipe instead of just sitting on top of the threads like an uninvited party guest.
Step 7: Make the Connection—Carefully
When threading the fitting onto your beautifully taped pipe, start it by hand to avoid cross-threading. Only use a wrench for the final tightening. And please, for the love of dry floors, don’t overtighten! Pipe fittings typically need only 1-2 turns past hand-tight.
Common Plumbing Tape Disasters and How to Avoid Them
The Shredded Mess
Problem: Tape gets shredded as you make the connection, potentially clogging your plumbing system.
Cause: Starting the tape at the very end of the threads or applying it in the wrong direction.
Fix: Start at the second thread and wrap in the direction you’ll turn the fitting.
The Leaking Seal
Problem: Despite using tape, the connection still leaks.
Cause: Not enough tape, not enough wrench tightening, or damaged threads.
Fix: Use 3-4 wraps minimum and ensure proper tightening. If threads are damaged, replace the fitting.
The Bulging Failure
Problem: Tape bunches up and prevents proper connection.
Cause: Applying tape in the wrong direction or with uneven tension.
Fix: Remember the “clockwise from the thread end” rule and maintain even tension.
The Overkill Catastrophe
Problem: Can’t get the fitting to thread properly because there’s too much resistance.
Cause: Using way too much tape (10+ wraps of “just to be sure” enthusiasm).
Fix: Stick to 3-4 wraps for water, 4-5 for gas. More isn’t better.
When NOT to Use Plumbing Tape
Despite its versatility, plumbing tape isn’t right for every situation:
- Don’t use on compression fittings that seal with compression rings or ferrules
- Don’t use on flare fittings that seal by metal-to-metal contact
- Don’t use on plastic threaded connections (unless specifically allowed by the manufacturer)
- Don’t use white tape for gas lines (use yellow gas-rated tape only)
- Don’t use it as a replacement for proper pipe dope in certain applications
The Pro’s Secret Weapon: Tape AND Dope
Here’s an insider tip from professional plumbers: For critical connections or stubborn leak-prone areas, use both pipe dope AND Teflon tape. Apply the tape first, then a thin layer of pipe dope over it. This belt-and-suspenders approach creates an almost unbeatable seal.
Just make sure the pipe dope is compatible with the tape and the type of pipe you’re using. Some pipe dopes can degrade certain plastics, which would definitely ruin your day.
When to Wave the White Flag (or White Tape)
DIY plumbing is great until it isn’t. Know when to call in the professionals:
- If you’ve tried multiple tape applications and still have leaks
- When working with gas lines, if you have any doubt whatsoever
- If the pipe threads are damaged, corroded, or severely worn
- When the consequences of failure include words like “flooding,” “major damage,” or “insurance claim,”
For Columbia, Missouri, residents, Brian Wear Plumbing has seen every threaded connection disaster imaginable and can tackle even the most stubborn leaks with professional expertise.
The Bottom Line: Tape Like a Pro
Proper use of plumbing tape is one of those simple skills that separates successful DIYers from those who end up with emergency plumber visits. Take the time to apply it correctly, and your threaded connections will remain leak-free for years to come.
Remember: clean threads, right direction, start at the second thread, maintain tension, 3-4 wraps, smooth it down. Follow these steps, and you’ll be taping like someone who actually knows what they’re doing—instead of someone who’s about to learn an expensive lesson about water damage. Any questions? Contact us at Brian Wear Plumbing.
Let’s be honest—plumbing tape doesn’t exactly scream excitement. It’s not trending on TikTok. Nobody’s posting Instagram stories about their “plumbing tape journey.” But this humble white tape can be the difference between a bone-dry connection and a slow drip that eventually ruins your ceiling, cabinets, or relationship as your partner listens to that maddening “plink… plink… plink” at 3 AM.
Known variously as Teflon tape, PTFE tape, or “that white plumber’s tape,” this seemingly simple product is misused by amateur plumbers everywhere. So let’s unwrap the mysteries and get you using it like someone who actually knows what they’re doing.
What the Hell Is Plumbing Tape Anyway?
Plumbing tape is a thin, stretchy tape made from polytetrafluoroethylene (PTFE), which is basically plastic with superpowers. It’s slippery yet creates a watertight and gas-tight seal when compressed between threaded metal connections. It’s also resistant to nearly all chemicals, handles extreme temperatures from -450°F to 500°F, and doesn’t age or degrade.
But here’s what plumbing tape is NOT:
- A magic fix for active leaks
- A replacement for a proper pipe fitting
- Electrical tape’s cousin
- Something to wrap around pipes like a mummy
The Great Plumbing Tape Misconception
The biggest myth about plumbing tape? It’s some kind of sealant that sticks to pipes and blocks water. Nope! Plumbing tape actually works as a thread lubricant that allows you to tighten threaded connections further, creating a better metal-to-metal seal. When compressed between the threads, it fills microscopic gaps that water or gas molecules can’t squeeze through.
This distinction matters because it explains why slapping tape on an existing leak does absolutely nothing except waste tape and make you look foolish in front of your pipes, which already judge you enough.
Types of Plumbing Tape: A Rainbow of Functional Options
Thought all plumbing tape was the same? Think again, amateur! Different colors serve different purposes:
White Tape: The Standard
- Thickness: Standard density
- Best for: Most residential water connections
- Working pressure: Handles up to about 3,000 PSI
- When to use it: Nearly all household plumbing with water or air
Yellow Tape: The Gas Guy
- Thickness: Higher density, typically 3.0-3.5 mil
- Best for: Natural gas, propane, and other combustible gas lines
- When to use it: Gas connections for water heaters, stoves, and outdoor grills
- Safety note: NEVER use white tape for gas connections!
Pink Tape: The Heavy-Duty Option
- Thickness: Highest density, around 4.0 mil
- Best for: Larger pipe sizes and higher pressures
- When to use it: Main water lines or high-pressure applications
Green Tape: The Oxygen Specialist
- Thickness: Similar to white
- Best for: Oxygen systems
- When to use it: Medical gas systems or oxygen-rich environments
- Why special?: Oil-free and won’t combust in pure oxygen
The Right Way to Apply Plumbing Tape (Yes, There IS a Wrong Way)
Here’s the step-by-step process that separates the pros from the people who’ll be calling the pros at midnight:
Step 1: Clean Those Dirty Threads
Before applying tape, make sure the pipe threads are clean and dry. Wipe off any gunk, old tape remnants, pipe dope, or microscopic debris. Putting tape over dirt is like putting clean underwear over dirty underwear—technically, you did something, but you missed the point entirely.
Step 2: Direction Matters—A LOT
This is where 90% of DIYers screw up. The tape must be applied in the same direction you’ll be turning the pipe—clockwise when looking at the end of the pipe. Why? Because when you screw the fitting on, it won’t push against the tape and cause it to bunch up or tear.
To remember the direction: Hold the threaded end of the pipe facing you. The tape should be unwound counterclockwise as you wrap it around clockwise.
Step 3: Start at the Right Spot
Begin wrapping the tape at the second thread from the end, not the very end thread. Starting at the end often results in the tape getting shredded as you screw the fitting on, creating debris that can clog aerators, shower heads, or other components. Nothing like solving one problem while creating another!
Step 4: The Tension Sweet Spot
Pull the tape slightly taut as you wrap. Too loose and it’ll bunch up; too tight and it’ll tear. You want just enough tension that the tape conforms to the threads without stretching into oblivion. Think of wrapping a present—you want the paper to follow the contours without ripping.
Step 5: The Magic Number: 3-4 Wraps
Three to four complete wraps around the pipe is the sweet spot for most household applications. Less won’t create a proper seal; more is just wasting tape and might make it harder to get the proper connection.
For gas connections, we at Brian Wear Plumbing strongly advise that only trained professionals handle any work involving gas lines. For safety reasons, we do not condone unlicensed or untrained individuals working on gas systems under any circumstances.
Step 6: Smooth It Down
After wrapping, run your fingers around the tape to smooth it down into the threads. This helps the tape bond to the pipe instead of just sitting on top of the threads like an uninvited party guest.
Step 7: Make the Connection—Carefully
When threading the fitting onto your beautifully taped pipe, start it by hand to avoid cross-threading. Only use a wrench for the final tightening. And please, for the love of dry floors, don’t overtighten! Pipe fittings typically need only 1-2 turns past hand-tight.
Common Plumbing Tape Disasters and How to Avoid Them
The Shredded Mess
Problem: Tape gets shredded as you make the connection, potentially clogging your plumbing system.
Cause: Starting the tape at the very end of the threads or applying it in the wrong direction.
Fix: Start at the second thread and wrap in the direction you’ll turn the fitting.
The Leaking Seal
Problem: Despite using tape, the connection still leaks.
Cause: Not enough tape, not enough wrench tightening, or damaged threads.
Fix: Use 3-4 wraps minimum and ensure proper tightening. If threads are damaged, replace the fitting.
The Bulging Failure
Problem: Tape bunches up and prevents proper connection.
Cause: Applying tape in the wrong direction or with uneven tension.
Fix: Remember the “clockwise from the thread end” rule and maintain even tension.
The Overkill Catastrophe
Problem: Can’t get the fitting to thread properly because there’s too much resistance.
Cause: Using way too much tape (10+ wraps of “just to be sure” enthusiasm).
Fix: Stick to 3-4 wraps for water, 4-5 for gas. More isn’t better.
When NOT to Use Plumbing Tape
Despite its versatility, plumbing tape isn’t right for every situation:
- Don’t use on compression fittings that seal with compression rings or ferrules
- Don’t use on flare fittings that seal by metal-to-metal contact
- Don’t use on plastic threaded connections (unless specifically allowed by the manufacturer)
- Don’t use white tape for gas lines (use yellow gas-rated tape only)
- Don’t use it as a replacement for proper pipe dope in certain applications
The Pro’s Secret Weapon: Tape AND Dope
Here’s an insider tip from professional plumbers: For critical connections or stubborn leak-prone areas, use both pipe dope AND Teflon tape. Apply the tape first, then a thin layer of pipe dope over it. This belt-and-suspenders approach creates an almost unbeatable seal.
Just make sure the pipe dope is compatible with the tape and the type of pipe you’re using. Some pipe dopes can degrade certain plastics, which would definitely ruin your day.
When to Wave the White Flag (or White Tape)
DIY plumbing is great until it isn’t. Know when to call in the professionals:
- If you’ve tried multiple tape applications and still have leaks
- When working with gas lines, if you have any doubt whatsoever
- If the pipe threads are damaged, corroded, or severely worn
- When the consequences of failure include words like “flooding,” “major damage,” or “insurance claim,”
For Columbia, Missouri, residents, Brian Wear Plumbing has seen every threaded connection disaster imaginable and can tackle even the most stubborn leaks with professional expertise.
The Bottom Line: Tape Like a Pro
Proper use of plumbing tape is one of those simple skills that separates successful DIYers from those who end up with emergency plumber visits. Take the time to apply it correctly, and your threaded connections will remain leak-free for years to come.
Remember: clean threads, right direction, start at the second thread, maintain tension, 3-4 wraps, smooth it down. Follow these steps, and you’ll be taping like someone who actually knows what they’re doing—instead of someone who’s about to learn an expensive lesson about water damage. Any questions? Contact us at Brian Wear Plumbing.
FAQ: Plumbing Tape Essentials
Q: What’s the difference between white and yellow plumbing tape?
A: White tape is for standard water and air connections, while yellow tape is thicker and specifically designed for gas lines like natural gas or propane.
Q: How many wraps of tape should I use?
A: For most household applications, 3-4 wraps are sufficient. For gas lines, use 4-5 wraps with yellow gas-rated tape.
Q: Can I use plumbing tape on plastic threads?
A: Only if the manufacturer specifies it’s safe. Over-tightening plastic threads with tape can cause cracks or leaks.
Q: Why does my connection still leak after using tape?
A: Possible reasons include not enough tape, damaged threads, or improper tightening. Reapply tape correctly or replace damaged fittings.
Q: Can I use plumbing tape on compression or flare fittings?
A: No. These fittings seal through compression or metal-to-metal contact and don’t require tape.
Click the button below to REQUEST a service appointment. Once your request is received, a customer service agent will contact you to confirm the scheduling.

Services Areas
Contact Brian Wear Plumbing Today
Feel free to give us a call today to schedule an appointment with a plumber in Columbia, MO, and the surrounding areas. Whether it’s doing drain line maintenance or preparing to replace sewer lines, you are going to be satisfied with our work.

")
If you are in Columbia, MO or the mid-Missouri area and believe you have a plumbing problem, contact us.